
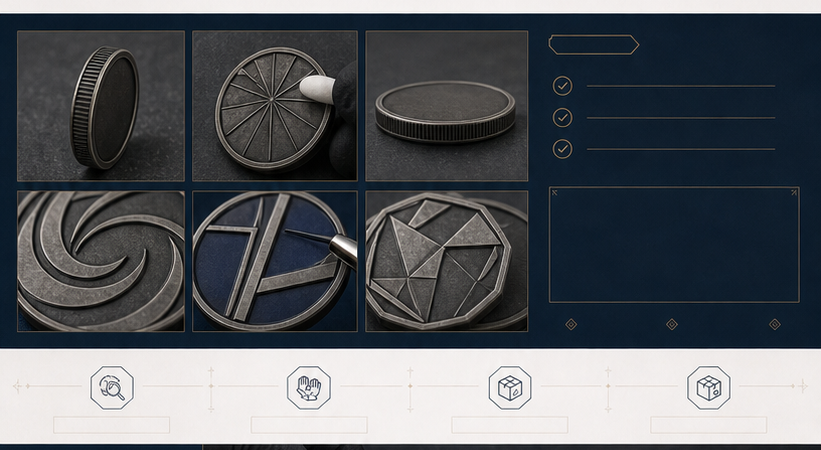
A custom metal product quality inspection checklist turns a general expectation into a project-specific reference. Coins, medals, pins, badges, keychains, and 925 sterling silver jewelry do not need identical checks. The correct checklist should follow the approved artwork, dimensions, material, relief, plating, enamel, engraving, attachments, packaging, quantity, and intended use.
This guide helps procurement teams, designers, retailers, schools, clubs, event organizers, and wholesale buyers prepare a practical inspection conversation with a custom metal manufacturer. It does not create a universal legal standard or guarantee an outcome; the acceptance reference should be agreed for each project.
Start with the approved specification
Before inspecting a sample or production run, collect the approved artwork, proof, dimensions, thickness, material, finish, color direction, attachments, packaging file, quantity, and delivery assumptions. Identify the version and date. If the product is a repeat order, include the previous approved sample or reference where relevant.
Separate fixed requirements from flexible visual preferences. A logo, date, size, S925 marking instruction, attachment type, or barcode may be fixed. A minor surface variation or packaging arrangement may need to be discussed according to the agreed project reference. Clear wording prevents the inspection from relying on personal taste alone.
Check product identity and quantity
Confirm that the correct product, design, variation, award level, finish, and packaging are being inspected. If multiple designs are in one shipment, label them clearly. Count the units, inner packs, cartons, cards, pouches, boxes, ribbons, hardware, or jewelry pairs according to the purchase record.
Check that the number of pieces in each inner pack matches the packing instruction. A correct product with an incorrect count can still create problems for an event, warehouse, retail order, or fulfillment team. Record any discrepancy with the design name, carton, and quantity affected.
Check dimensions and physical construction
Measure the dimensions that matter to the product: diameter or width, height, thickness, hole, loop, ring, bail, clasp, pin post, backing location, or assembled length. For a medal, review the ribbon connection. For a keychain, check the ring and hardware clearance. For a badge or pin, check the attachment position. For jewelry, check product size, pair matching, and connection points.
Compare the measurement method with the approved specification. A product photograph is not a substitute for a dimension reference. If a tolerance has been agreed, record the measured value and the reference range. If no tolerance exists, identify the question before treating a visual difference as a failure.
Check relief, edges, and artwork
Review raised and recessed relief, borders, cutouts, edge treatment, lettering, logos, dates, and orientation. Small text should be read at the intended viewing distance. Check whether the relief is clear enough to support the approved hierarchy and whether a sharp or unfinished edge affects handling or presentation.
For 2D and 3D products, compare the physical item with the approved proof. A render can suggest depth but may not show every physical transition. Note whether any design change was approved after the original proof. Keep the inspection tied to the latest approved version.
Check plating and surface finish
Inspect the selected gold, silver, black, copper, polished, brushed, antique, or other surface direction together with relief and lighting. Look for coverage, unexpected marks, visible stains, inconsistent contrast, or a surface that hides important wording. Use the approved reference and avoid judging a physical surface from a screen color alone.
For a repeat order, compare the new product with the saved sample under a consistent viewing condition where possible. Lighting, photography, surrounding colors, and camera settings can change perceived tone. Record the observation instead of making an unsupported claim about an exact color match.
Check enamel and engraving
Where enamel is used, inspect color fields, metal borders, fill, overflow, bubbles, gaps, and the relationship between enamel and relief. The correct check depends on the approved design and color direction. Where engraving is used, check wording, character sequence, line clarity, location, depth or contrast direction, and orientation.
Variable names, serial numbers, dates, and initials require a separate data check. Compare the physical sequence with the approved list. The buyer should confirm spelling, capitalization, special characters, leading zeros, and permissions for submitted names or text.
Check hardware, assembly, and packaging
Inspect pin backs, clutches, screws, magnets, jump rings, clasps, chains, ribbons, posts, bails, and other attachments according to the product. Confirm that the item hangs, closes, attaches, or opens in the intended way. Check for sharp interference, loose parts, incorrect orientation, or hardware that covers the artwork.
Inspect packaging fit, protection, card wording, labels, product orientation, quantity per pack, carton identification, and assembly. Polished and plated surfaces may need protection from rubbing. A complete inspection should include the assembled, packed product rather than only a loose metal body.
Record findings consistently
Use a table with the item, specification, observed result, reference image or sample, affected quantity, disposition, owner, and follow-up date. Add photographs that show scale and location, not only attractive close-ups. Mark whether the issue is a design change, production question, packaging problem, counting problem, or delivery concern.
Agree how comments will be handled. One purchasing contact should consolidate feedback so production does not receive conflicting instructions. If rework, replacement, acceptance, or another action is discussed, record the decision and link it to the relevant batch or carton.
Use the checklist for reorders
A reorder checklist should include the final artwork, dimensions, finish, sample, packaging file, quantity, inspection reference, and notes about approved variations. A new product in the same collection should not automatically inherit every old assumption. Review changed size, relief, attachment, material, plating, or destination before production.
For B2B buyers, the inspection record supports purchasing and customer service. It helps explain what was ordered, what was approved, what was checked, and what should be reviewed next time. It is more useful than a general claim that a supplier provides high quality.
How to prepare the project
Start with the product purpose, audience, artwork status, dimensions, material direction, finish, quantity, packaging, destination, and target date. Separate fixed requirements from flexible preferences and identify the person who will approve the final proof. A clear brief helps a manufacturer answer practical questions before tooling or sampling.
Keep one version of the artwork and record dates, wording, logos, colors, attachments, and packaging notes. If a reference image is only an inspiration, label it clearly. The buyer remains responsible for confirming artwork permissions and final spelling.
How Zincustomized supports the order
Zincustomized reviews zinc alloy, stainless steel, copper, plating, enamel, engraving, relief, packaging, sampling, and quality references according to the product brief. We do not invent certifications, customer counts, client logos, or guaranteed outcomes. The confirmed production route depends on the product, design, quantity, finish, and delivery requirements.
Send the artwork, quantity, dimensions, finish, packaging, destination, and target date through the custom metal quote request page, email liam@zincustomized.com, or WhatsApp.
Frequently asked questions
What should be checked first?
Start with product identity, quantity, approved artwork, dimensions, material, finish, attachments, and packaging. Then inspect detail-specific features such as relief, enamel, engraving, and variable data.
Does every product need the same checklist?
No. A medal, keychain, pin, badge, coin, and jewelry item have different functional and presentation requirements. The checklist should follow the approved specification.
Should inspection include packaging?
Yes. Fit, protection, labels, counts, orientation, and assembly can affect the delivered customer experience.
Build a checklist by product type
A coin checklist may prioritize diameter, thickness, relief, edge, plating, enamel, engraving, weight, and presentation. A medal checklist should add ribbon, loop, hanging direction, award level, and packaging. A pin or badge checklist should include post location, clutch, screw, magnetic or other attachment, backing card, and the way the item is worn. A keychain checklist should review ring, chain, clasp, bottle opener, edge, and assembled length. Jewelry requires product size, pair matching, posts, clasps, chains, S925 marking instructions, and care communication.
Using a product-specific checklist prevents a buyer from approving the wrong feature. A beautifully finished coin can still be incorrect if the edge wording is wrong. A correctly plated badge can still be unusable if the attachment is positioned incorrectly. The purpose of inspection is to compare the complete product with the approved requirement, not just to look for attractive surfaces.
Separate visual, dimensional, and functional checks
Visual checks cover logos, wording, relief clarity, plating coverage, color fields, polishing, antique contrast, engraving, edge condition, and visible marks. Dimensional checks cover width, height, diameter, thickness, holes, loops, posts, chains, clasps, and assembled length. Functional checks cover attachment, opening, closing, hanging, wearing, handling, packaging fit, and any agreed product action. Record which type of check produced an observation.
This separation makes communication clearer. A dark area in a recessed field may be a finish question. A loose clasp may be a functional question. A missing date is an artwork question. A carton with the wrong count is a packing question. Each issue can then be assigned to the correct owner instead of being described only as a general quality concern.
Use photos that explain the issue
Inspection photos should show the product, the affected area, and enough context to identify the design or batch. A close-up can show a small mark, but a second image may be needed to show which face, edge, carton, or variation is involved. Add a reference to the approved artwork or sample when possible. Avoid relying on a single attractive image that hides the scale or location of an observation.
For variable products, record the name, serial number, design, or quantity affected. For multi-design wholesale orders, identify the inner pack and carton. Clear documentation helps a buyer request a correction or acceptance decision without asking the supplier to guess which units are being discussed.
Agree the response before shipment
Before inspection begins, confirm how observations will be handled. Some projects may require a clarification, some may need rework or replacement, and others may be accepted against an agreed reference. The response depends on the purchase terms, approved specification, affected quantity, delivery schedule, and buyer’s requirement. Do not invent a tolerance or acceptance rule after a dispute appears.
Write the decision, owner, affected quantity, and next date. If a correction is made, inspect the corrected units and update the record. If the buyer accepts a known visual difference, link the decision to the sample or reference. This creates a more useful quality history for a future order.
Connect inspection with customer service
For retail or wholesale products, customer service teams may need the material wording, finish direction, care note, package format, and approved product images. The inspection record can confirm which version was shipped and which packaging belongs to it. This is helpful when a buyer has several finishes or when a collection contains similar designs.
Do not use the inspection record to make unsupported claims about certifications, durability, or performance. Describe only the approved material, finish, process, and observed result. If market-specific compliance information is required, the buyer should confirm the applicable rules for the destination and product category.
Final approval record for the team
Before the product is released, the buyer should confirm the final artwork version, product name, material, dimensions, finish, quantity, package, inspection reference, and delivery assumption. Store these items together with the purchase order and sample notes. A clear record lets design, procurement, warehouse, and customer service teams answer the same basic questions without relying on different screenshots or messages.
If a change is requested after approval, record what changed and ask whether it affects tooling, sample, price, packaging, inspection, or timing. This simple step protects the launch plan and makes the manufacturer’s next quotation more accurate. Zincustomized can review the updated specification and identify open questions before production continues.
Close the inspection record properly
When the inspection is complete, record the final disposition for each open item and identify the approved batch or carton. Save the checklist, photographs, sample reference, and corrective communication together. A closed record gives purchasing and customer service a reliable answer if a question appears after delivery.
For a future production run, use the record as a starting reference rather than an automatic guarantee. Reconfirm the current artwork, dimensions, finish, packaging, quantity, destination, and inspection scope before placing the next order.
Record the checkpoints that matter to your order
A practical inspection record should connect the approved proof to the delivered goods. Check dimensions, thickness, color placement, plating consistency, relief definition, attachment position, quantity, packaging, and visible surface defects. If the project includes variable engraving, confirm a sample of the data rather than checking only the first piece.
Keep the approved artwork, finish reference, packaging specification, and inspection notes together. This creates a useful baseline for reorders and makes it easier to explain any issue with specific evidence.