
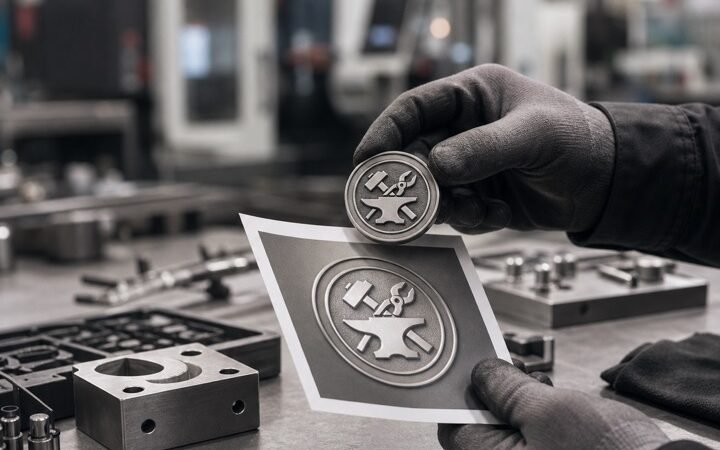
Challenge coin sizes affect more than appearance. Diameter, thickness, relief, edge treatment, lettering, weight, packaging, and the way the coin will be carried or presented all influence the final specification. For most custom projects, the right size is the smallest format that keeps the important artwork readable and gives the coin an appropriate physical presence.
This guide explains how to compare common challenge coin sizes, how size changes design and production decisions, and what schools, clubs, brands, retailers, and wholesale buyers should include when requesting a quote from Zincustomized.
Quick challenge coin size chart
The table below is a planning reference. The final result also depends on thickness, relief depth, artwork complexity, finish, and the viewing distance of the finished coin.
| Diameter | Typical planning use | Design considerations |
|---|---|---|
| 1.25 inches | Compact membership gifts, pocket carry, small presentation cards | Best for simple logos, short wording, and restrained relief |
| 1.50 inches | General recognition coins, clubs, events, and corporate programs | A versatile balance of portability, detail, and presentation |
| 1.75 inches | Detailed emblems, school or organization programs, display-focused coins | More room for borders, dates, relief, enamel, and secondary wording |
| 2.00 inches | Commemorative pieces, anniversary projects, large mascots, presentation boxes | Creates stronger presence but adds weight, packaging, and shipping considerations |
What challenge coin size means in practice
When buyers say they need a certain coin size, they usually mean the outside diameter of a round coin or the maximum width and height of a shaped coin. That measurement should be separated from thickness. Two coins can have the same diameter but feel very different if one is thin and flat while the other has deeper relief and a heavier edge.
For a shaped coin, describe the maximum width, maximum height, and the area where the attachment or edge treatment will sit. A shield, mascot, building, map, or tool silhouette may not fit neatly into a circular measurement. Give the manufacturer a clear outline and identify which dimensions are fixed.
How to choose the best size for the artwork
Start by identifying the smallest element that must remain readable. This may be a school name, club abbreviation, year, rank, sponsor line, serial number, or edge message. If that detail is important, let it influence the size decision. Trying to fit too much information into a small coin can produce weak contrast, crowded borders, and lettering that is difficult to check after plating.
Simple symbols can work well at a compact size. Detailed illustrations, mascots, architectural outlines, and multi-level relief usually benefit from more surface area. A larger coin is not automatically better, however. The design should be balanced with the recipient, carrying method, presentation style, and budget.
1.25-inch challenge coins
A 1.25-inch coin can be useful when portability is important. It may suit a compact membership gift, an insert for a card, a small club token, or a project that needs a lighter object. The artwork should usually be simple and strongly hierarchical. A central emblem, short word, or clean symbol is easier to manage than a detailed scene with multiple lines of small text.
At this size, review the border, relief, enamel fields, and edge treatment carefully. Narrow gaps and fine lettering can disappear when the product is physically small. If the coin must include a date or organization name, consider using the back or packaging card for secondary information.
1.5-inch challenge coins
A 1.5-inch coin is often a practical starting point for a general recognition project. It provides more room than a compact coin while remaining easy to carry and package. Clubs, schools, corporate programs, event organizers, and retail buyers may consider this size when the design needs a clear logo, a short message, a border, and a modest amount of relief or enamel.
The final specification still needs a review of thickness and finish. A polished surface can make a small line look different from an antique surface, and enamel boundaries need enough metal separation. Ask for the proposed size in a proof and examine the smallest important feature at the intended scale.
1.75-inch challenge coins
A 1.75-inch coin offers more space for an organization crest, mascot, anniversary date, edge wording, or a more detailed relief direction. It can suit display-focused recognition projects and programs where the coin is presented in a box or kept as a commemorative item. The added area can also help separate front and back information instead of crowding every message onto one face.
With more surface area comes more opportunity for inconsistency. Borders, lettering, relief levels, enamel, and plating should be designed as a single system. A large empty area can make a design feel unfinished, while too many details can make it difficult to understand. A clear artwork hierarchy is more valuable than filling every available space.
2-inch challenge coins
A 2-inch coin creates a noticeable physical presence and can work for anniversaries, commemorative programs, large emblems, detailed mascots, and presentation sets. It may be appropriate when the coin will be displayed, handed over in a formal ceremony, or placed in a larger box. Buyers should also account for the added weight, storage, shipping volume, and package fit.
At this size, the artwork can support more detail, but a larger canvas does not remove production limits. Relief transitions, thin lines, cutouts, edge wording, and color fields still need to be checked. Discuss the desired thickness and weight direction instead of selecting diameter alone.
Diameter, thickness, and relief work together
Diameter determines the available face area, but thickness influences weight, edge feel, relief depth, and packaging. A thin coin may be easier to carry, while a thicker coin can feel more substantial. Deep 3D relief may require more vertical space than a simple 2D logo. The best combination depends on the purpose and the design.
When requesting pricing, list diameter, thickness, relief type, edge, material, plating, enamel, engraving, quantity, packaging, destination, and target date. The custom challenge coin size guide can help organize these variables before artwork approval.
How size changes cost and packaging
Size can affect material usage, tooling, finishing area, weight, carton dimensions, and shipping. It is only one part of the cost, but it should be compared with quantity and production complexity. A larger coin may need a larger box or individual pouch, while a compact coin may be packed efficiently in bulk.
Compare supplier quotes using the same dimensions and quantity. Ask whether tooling, samples, plating, enamel, packaging, inspection, and freight are included. The challenge coin cost guide gives buyers a practical checklist for comparing the complete project rather than a unit price alone.
Size recommendations by use case
- Membership or pocket carry: consider a compact size with simple artwork and limited wording.
- School or club recognition: compare 1.5 and 1.75 inches based on crest detail, year, and presentation.
- Corporate or event programs: choose the size that supports the logo, recognition message, quantity, and packaging.
- Anniversary or commemorative presentation: a larger size may suit detailed relief and a presentation box.
- Retail collections: prioritize consistent proportions, packaging, finish, and reorder records across the range.
Artwork proofing and physical samples
A digital proof can show the proposed diameter, thickness, front, back, edge, relief, plating, and enamel direction. Review spelling, dates, logos, orientation, and the smallest important feature before approval. If physical feel, weight, finish, packaging, or relief is important, discuss a sample rather than relying only on a screen render.
Zincustomized reviews the relationship between artwork and production details including zinc alloy, stainless steel, copper, plating, enamel, engraving, packaging, and quality reference points. We do not present a digital render as a guarantee of the finished physical appearance.
How to request a custom challenge coin quote
Send the artwork or sketch, intended use, diameter, thickness direction, material preference, relief, edge treatment, plating, enamel, quantity, packaging, destination, and target date. If the design is still in development, identify which elements are fixed and which can be adjusted. This helps the manufacturer answer practical questions before tooling or sampling.
Start with the custom challenge coin manufacturer page, use the quote request page, or contact Zincustomized on WhatsApp.
Frequently asked questions
What is the most common challenge coin size?
There is no single best size for every project. A 1.5-inch format is a practical starting point for many general recognition designs, while smaller or larger sizes may be better for compact carry, detailed artwork, or presentation-focused projects.
Is a larger challenge coin always better?
No. Larger coins provide more design area but also add weight, packaging, storage, and shipping considerations. Choose a size that matches the artwork and use case.
Does thickness matter as much as diameter?
Yes. Thickness affects weight, edge feel, relief, and packaging. Include it in the specification instead of quoting diameter alone.
How do I choose a size for a school or club coin?
Compare the crest detail, wording, year, quantity, recipient age range, carrying method, and presentation. Review the smallest important text at the actual size before approval.
Make the size decision from the artwork outward
Diameter is only one part of a challenge coin specification. The usable design area also depends on the rim, relief height, lettering, and whether the reverse side carries separate information. For a school crest, club emblem, or corporate mark, we recommend reviewing the smallest text and narrowest line before choosing the final diameter. A larger coin can improve legibility, while a compact coin may be easier to carry and more economical for a large recognition program.
During quotation, send the intended size range, artwork, quantity, and preferred finish together. Zincustomized can then review whether the design is better suited to 2D relief, 3D relief, engraving, color fill, or a combination. A production proof should be approved before tooling or mass production begins.
Choose diameter and thickness together
Diameter is the most visible size decision, but thickness changes the way a challenge coin feels in the hand, sits in a presentation box, and communicates value. A larger diameter gives artwork more room, while a greater thickness can support a stronger edge, deeper relief, or a heavier presentation. The right balance depends on the emblem, the amount of lettering, the handling context, and the budget rather than on a single universal “best” size.
Review the smallest important feature first. If the coin includes a school crest, club name, motto, date, or fine linework, identify the smallest text and narrowest gap in the artwork. A larger diameter may improve readability, but it cannot automatically solve a design with too many words. Simplifying the wording, moving information to the reverse, or using engraving for a short variable field may produce a clearer result than increasing the coin indefinitely.
How size affects the project
- Handling: compact coins are easy to carry; larger coins create a stronger display presence.
- Artwork: more surface area can help with lettering, borders, and separate design zones.
- Weight: thickness and diameter both affect packing, shipping, and how the coin is presented.
- Finish: broad raised areas and recessed details may read differently at different scales.
- Packaging: boxes, cards, and pouches need internal dimensions that match the finished item.
Ask for the proposed diameter, thickness, relief type, edge, finish, and packaging to appear together on the proof. A scale drawing alone can hide how the coin will look under normal lighting. If the project is a reorder, compare the new drawing with the approved previous sample and mark any change in size, thickness, finish, or artwork version.
Zincustomized helps buyers review size with materials, die casting, relief, plating, polishing, color fill, inspection, and packaging. Use the custom challenge coin size guide, compare the broader challenge coin sizes guide, and request a quote with the intended quantity and destination.